
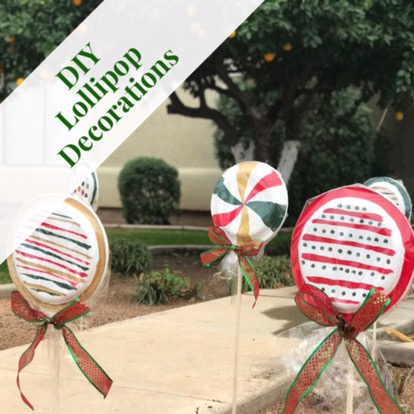
This is our second time around making these DIY Lollipop Christmas Decorations. The first time we made them, they weathered two Arizona winter’s before looking a little rough. They are so easy and inexpensive to make, that I tossed them in the recycle bin, and started fresh this year.
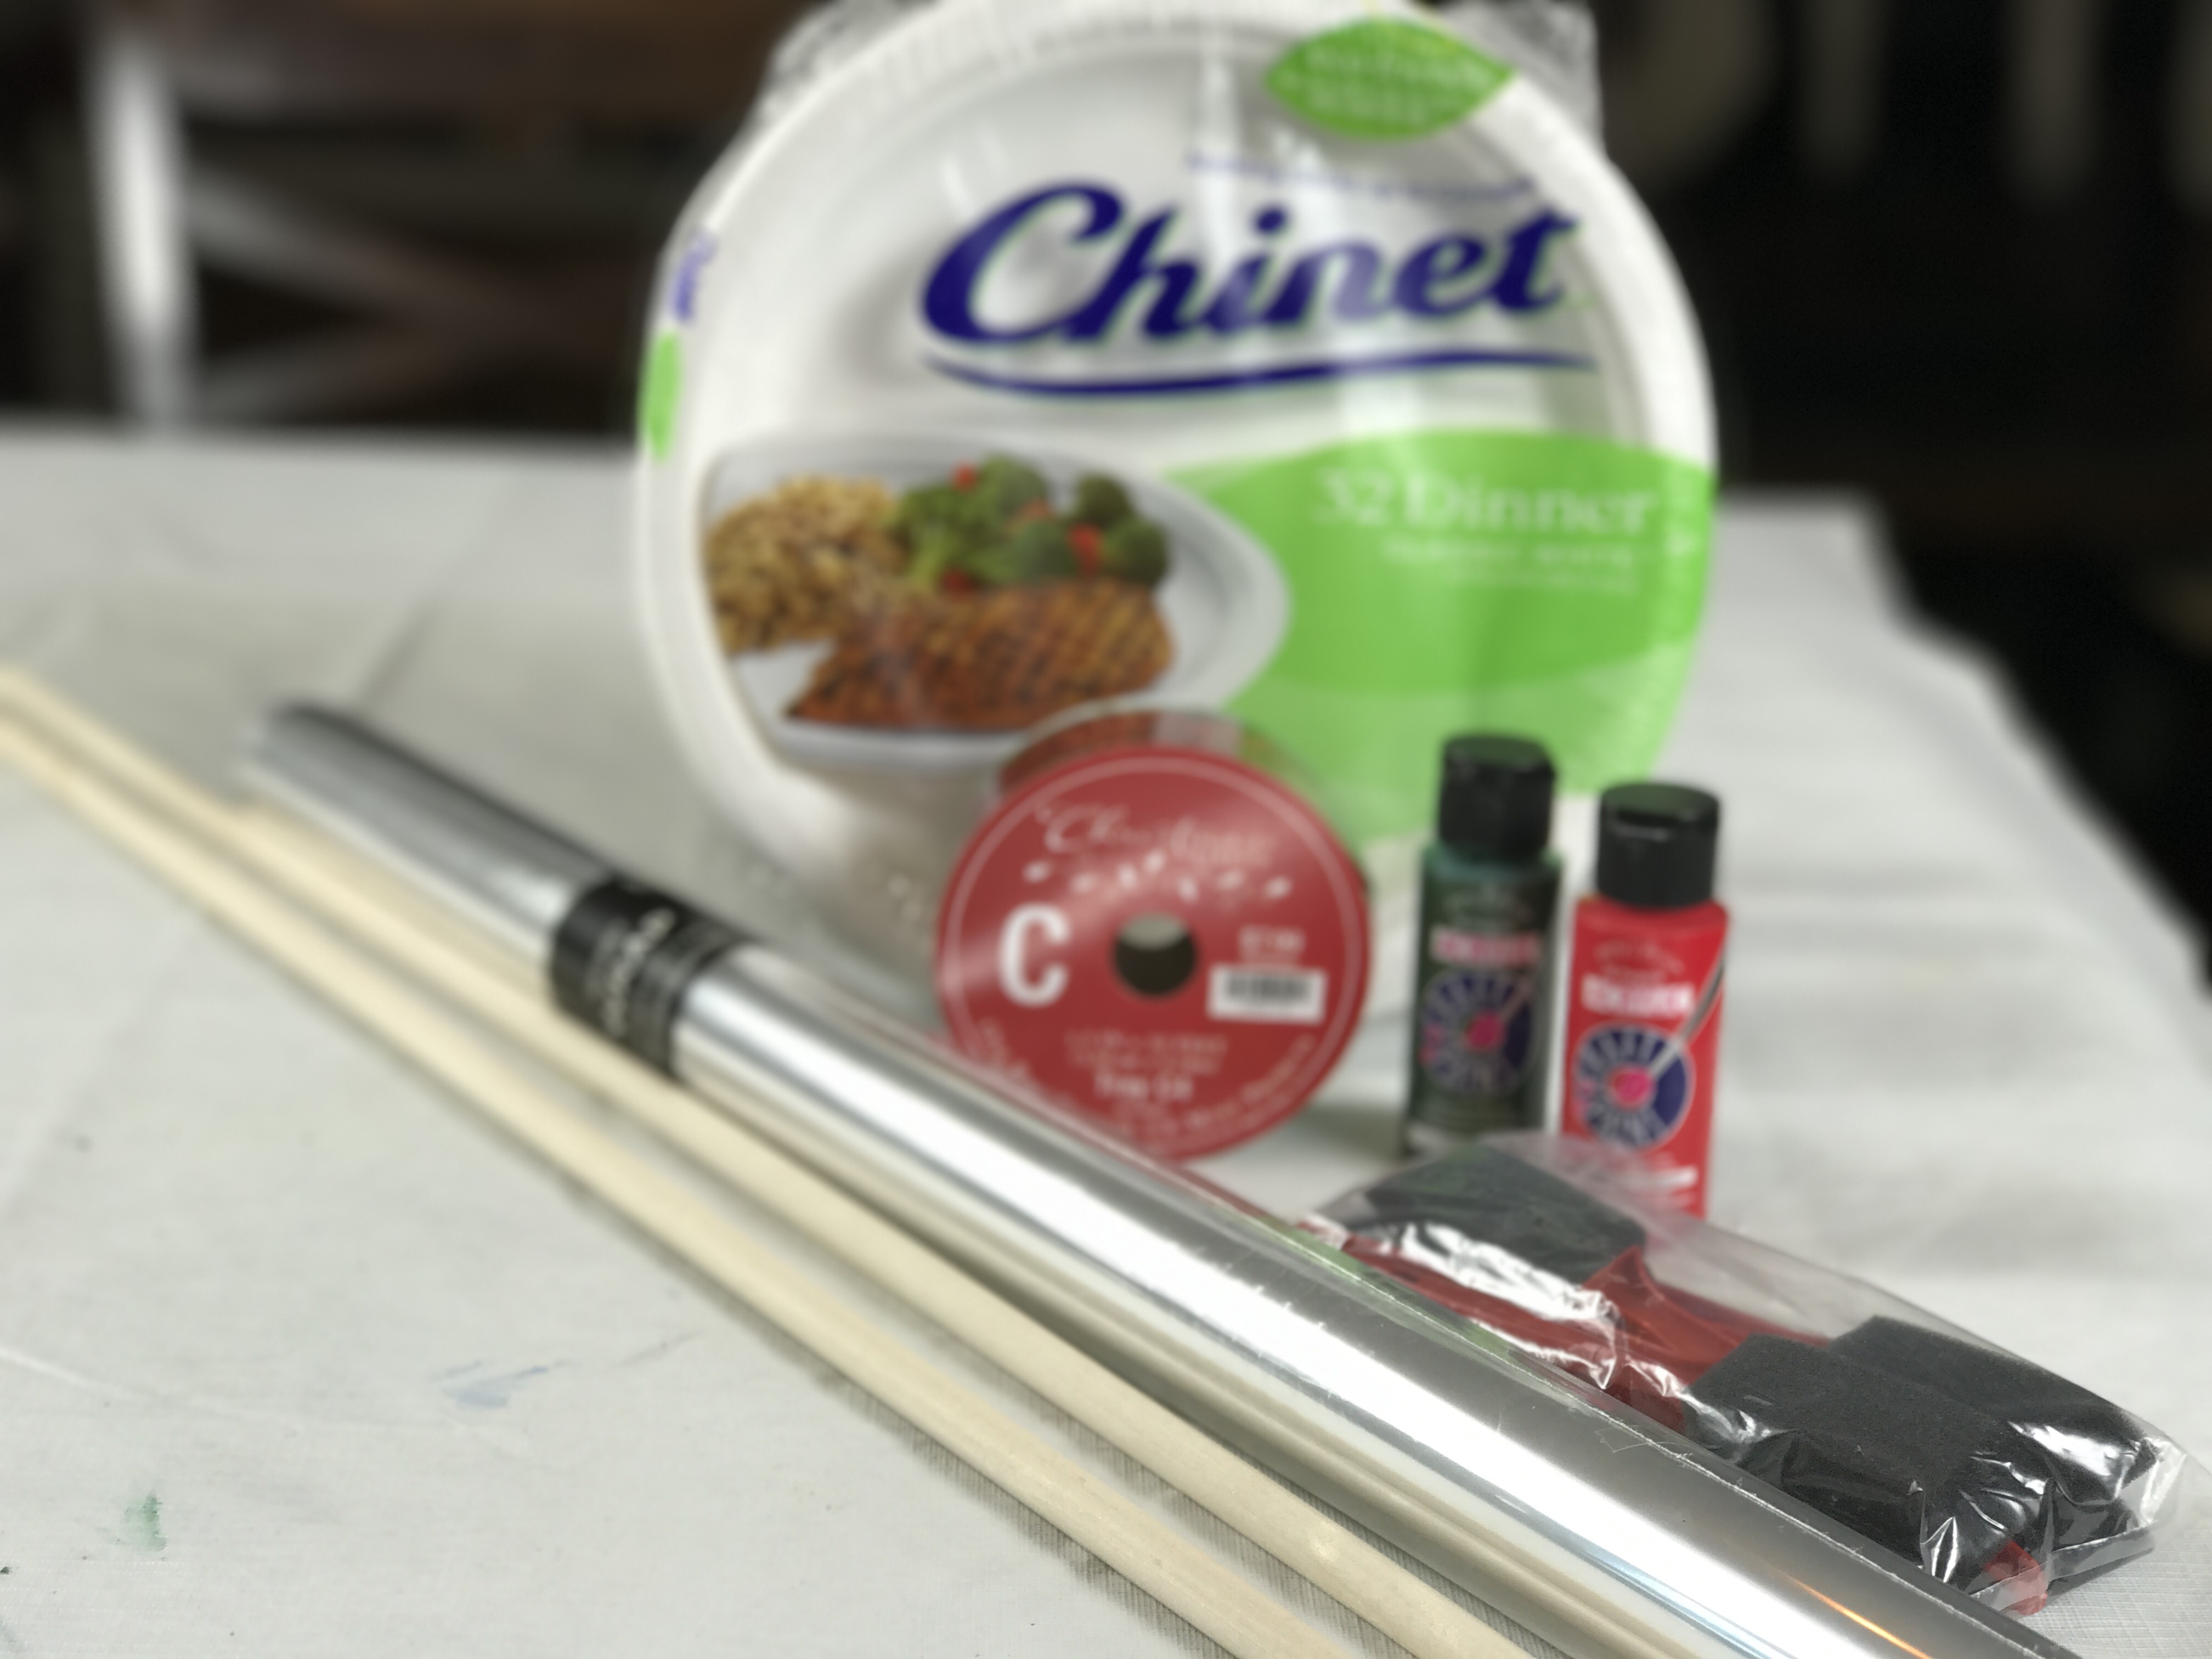
Here is what you will need:
- 10 Wooden Dowel Rods (The one’s we used this year are about 3 feet tall and were purchased at Hobby Lobby for .99 cents each)
- Paper Plates (We used Chinet because they are a little thicker than the other brands.)
- Americana Acrylic Paint
- Foam Brushes
- Clear Basket Wrap
- Ribbon
- Glue Gun
Step 1: Paint the paper plates. This is the time to unleash your creativity!
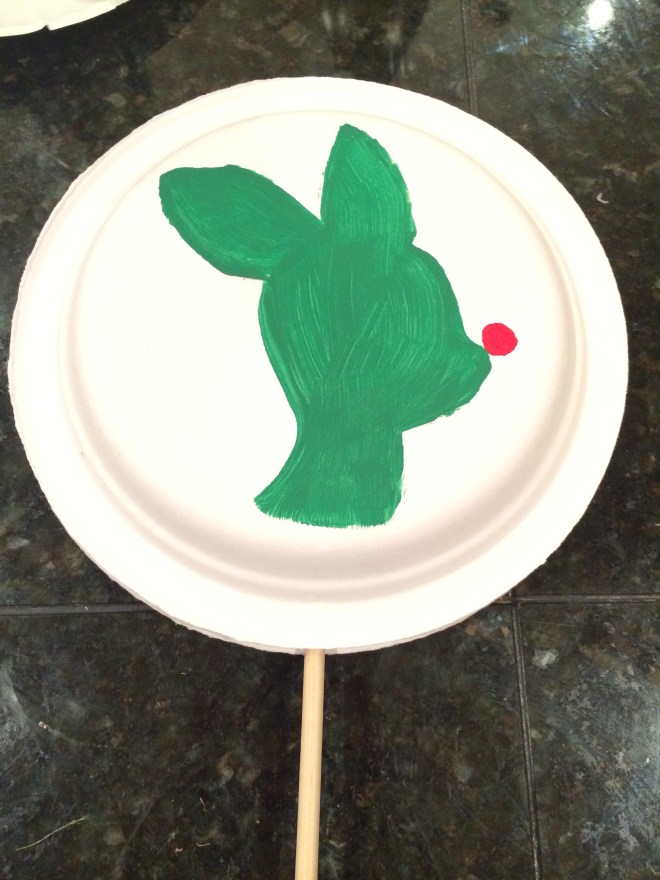
Step 2: Time to glue! I started by attaching the wood dowel directly to the plate with the hot glue. Once that dries, glue the perimeter of the plates together.

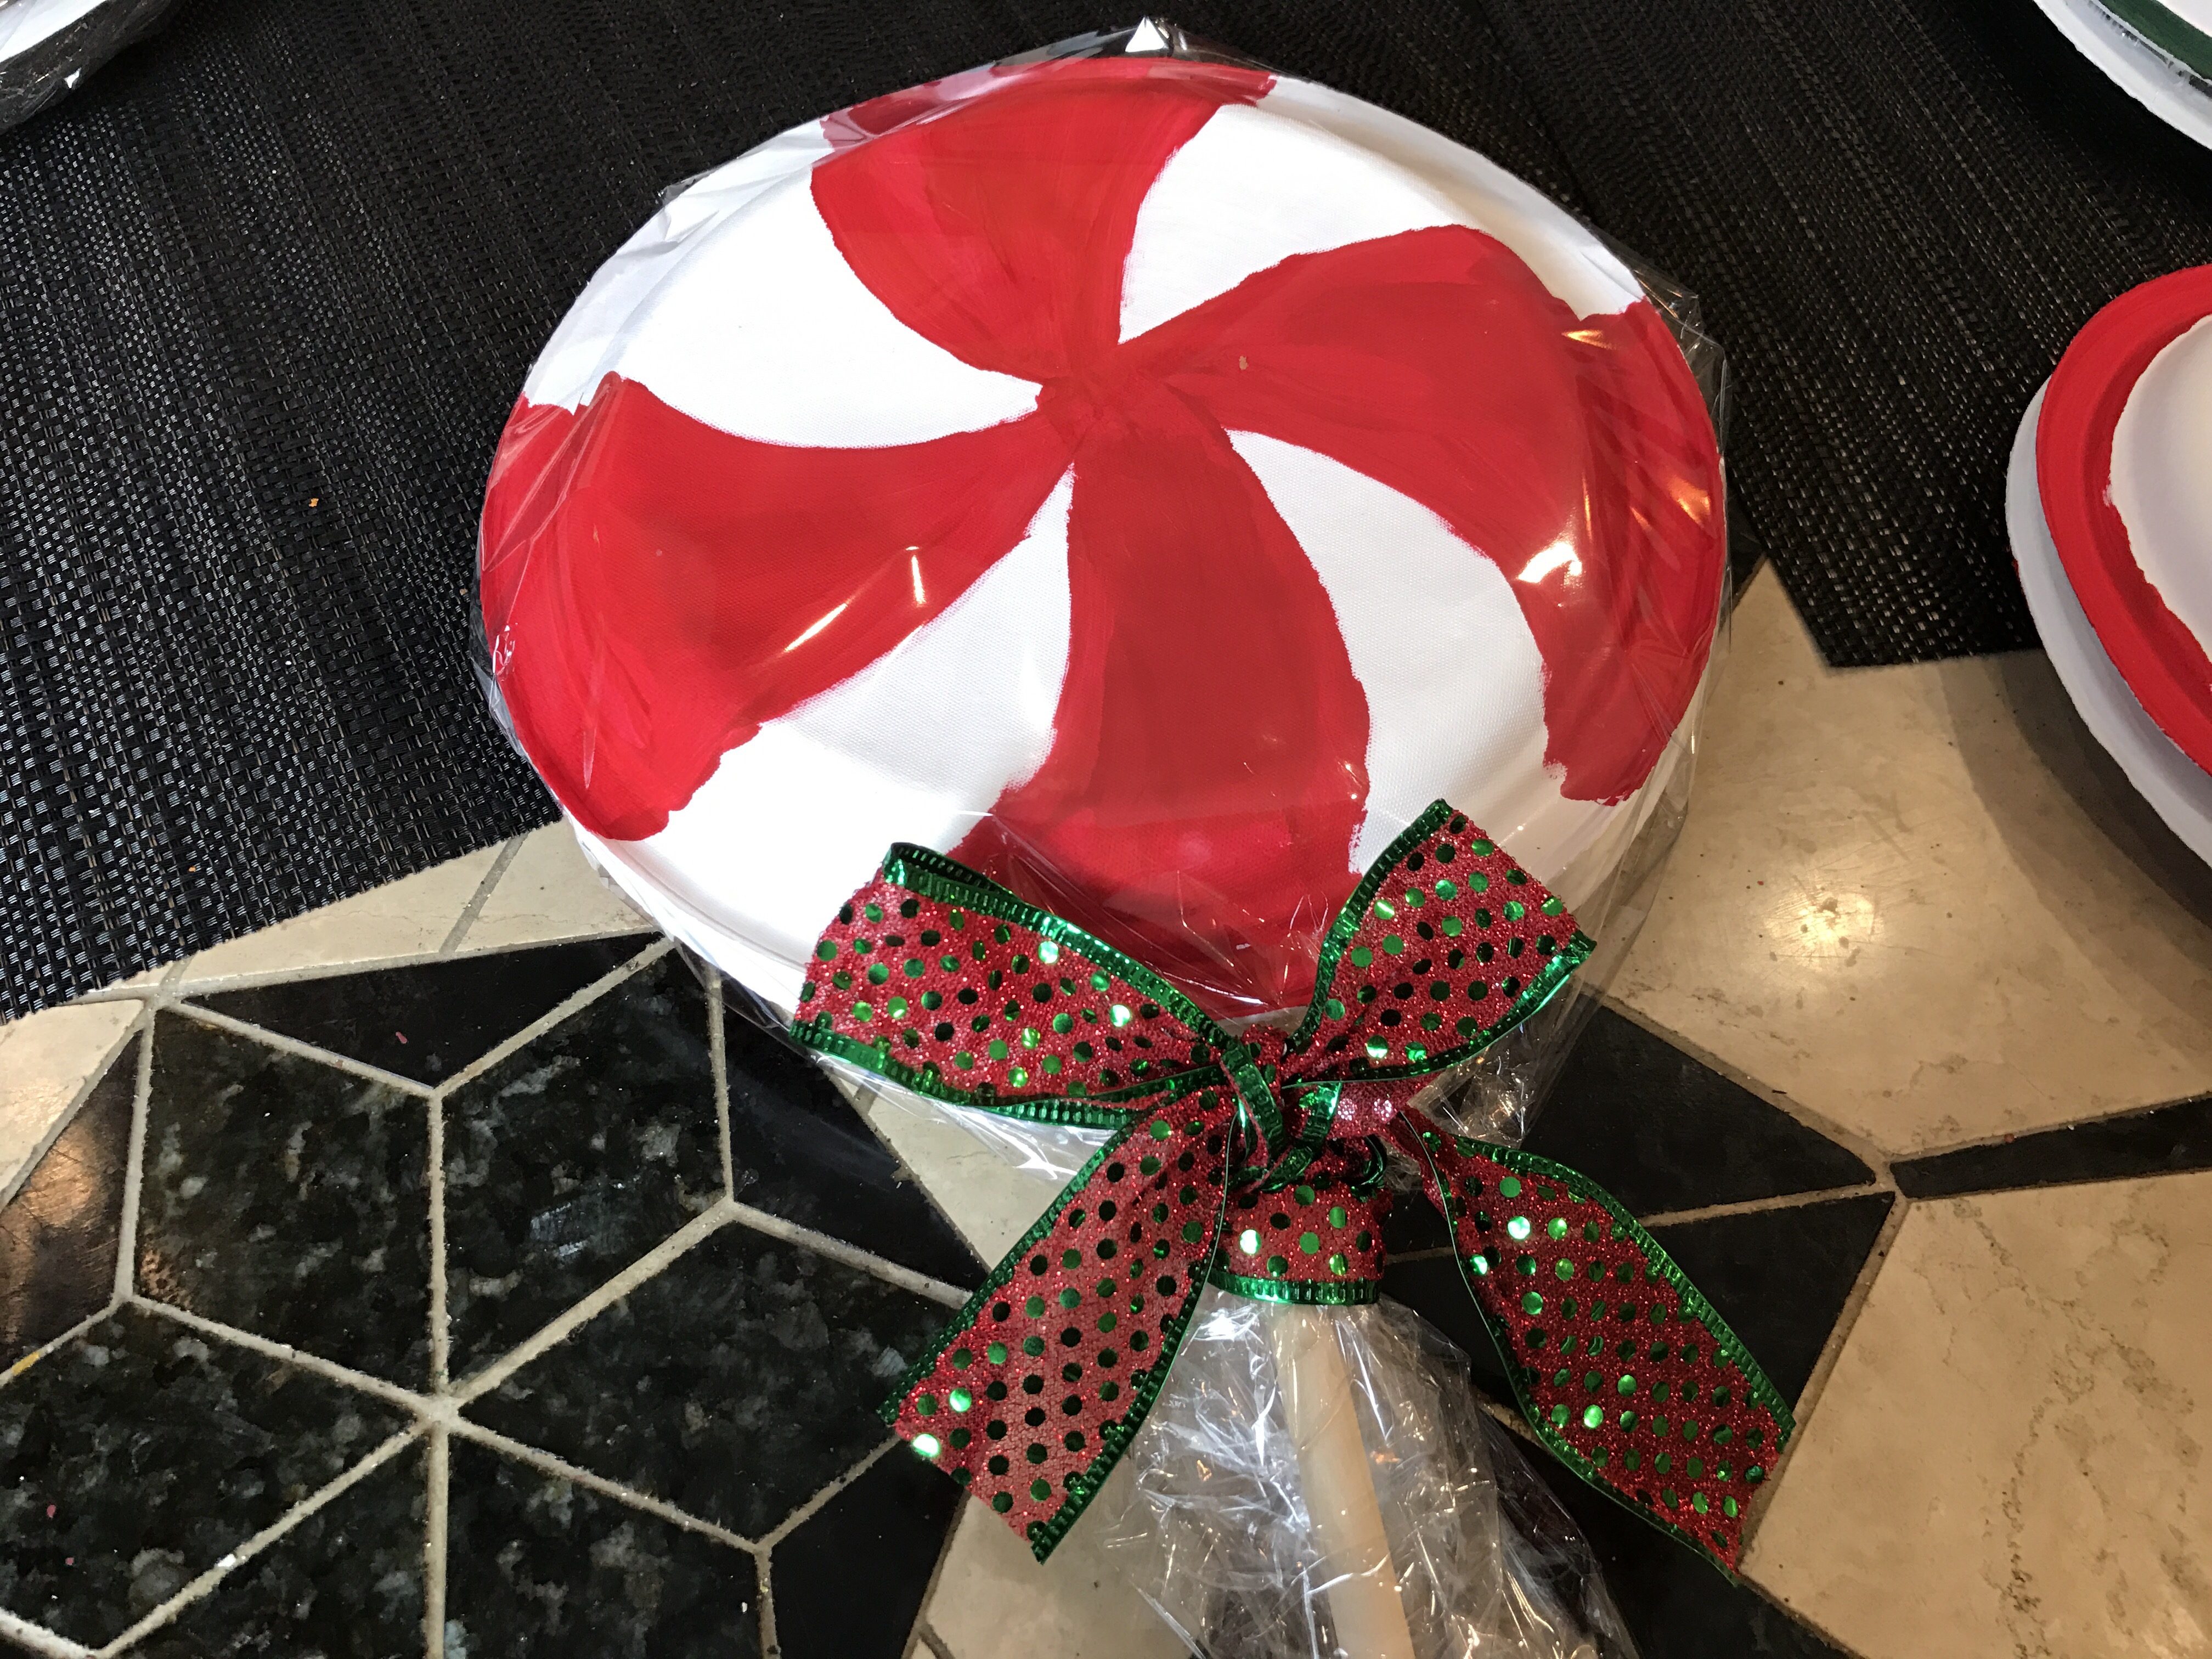
Step 3: It’s time to wrap these lollipops up! Cut a piece of the clear wrap, about 3-4 feet long. Place the lollipop in the center, and fold the other half of the wrap down (kind of like wrapping a present). Continue folding until all of the wrap is covering the back side of the lollipop.


Step 4: Tie a knot around the wood dowel to hold the plastic wrap in place.

Step 5: Flip it over, and finish it off with a bow!
Step 6: Display them for everyone to admire and enjoy!

I put these where our rose bushes normally are, in hopes that they will stay a little more dry than if I had placed them in the grass were the sprinklers would hit them. I think they are going to compliment my plans for a festive mailbox, as well as the DIY Life-size Nutcrackers! To watch a quick video on the DIY Lollipop Decoration assembly, click here.

Cheers!
